So we had a busy week last week trying to get everything done, or at least as much as possible. I mean, we knew we wouldn’t be 100% finished because we don’t have all the remaining materials yet. But we’re getting there, despite the fact that we have added some work for ourselves as well as had to do some other family stuff. And was sick inna hedge.
This post is freckled with pictures from the Extreme DIY 2009/2010 gallery.
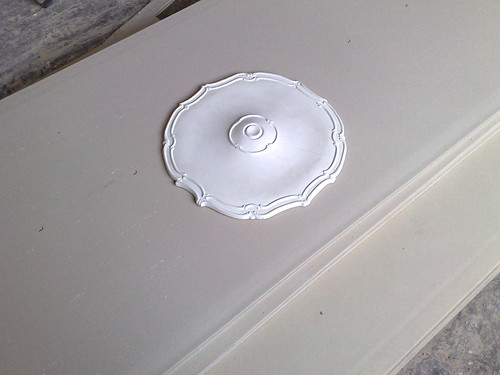
I took Friday 18th off work as comp time and we headed down to Place du Carl Berner, Oslo, to retrieve our mouldings. Turns out the shipment was split up, so we only received the moulding roses ("rosette") for our two living room ceilings:
See also this top-view blurry picture
It’s very modest but still attractive, even though it’s not attached yet. They were ordered from Floret Interiør Design who will accept orders till around September when they’re closing the business. They are the cheapest in Norway on these kind of products, as far as I know. As well as friendly and professional.
The rest of Friday was spent setting up one and a half wall, leaving one remaining wall.
Come Saturday 19th we were almost out of tile mortar, the economically viable alternative to plaster mortar ("gipsbruk") from Norgips. Being without a car though, we emptied our peach-colored roller suitcase and headed for the nearest Maxbo only a bus stop away. They didn’t have any tile mortar cheaper than Norgips’ plaster mortar, so we ended on 25Kg of the latter.
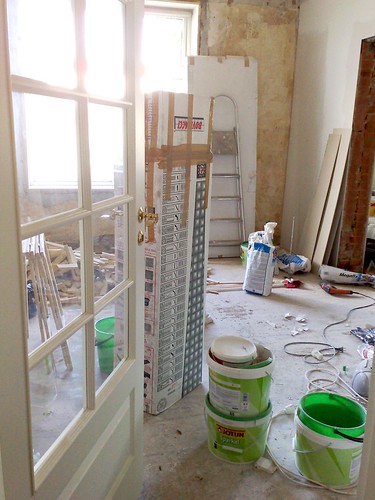
Upon arriving home we found that the last shipment from Floret had arrived with the mouldings for the living room and hallway ceiling, so we just quickly scurried down to Carl Berner hoping that we would be able to carry the package(s) between us. Turned out Floret had done a nice packing job, and we managed to haul it home before the skies opened:
That package is taller than me. See sample of blurry close-up here
Here’s the mouldings for the living room and the hallway respectively:


We finished the day by putting up the the last wall of our apartment!
Saturday evening my brother Koew had a get-together, and since my sister was in town we decided to join in and get drunk. POOR DECISION. It was a lot of fun, no doubt, but since this year’s been cold as frak you can’t stay warm in the evenings. So Lady C got really cold, then hot, then slept for two days.. All Sunday and parts of Monday were wasted.
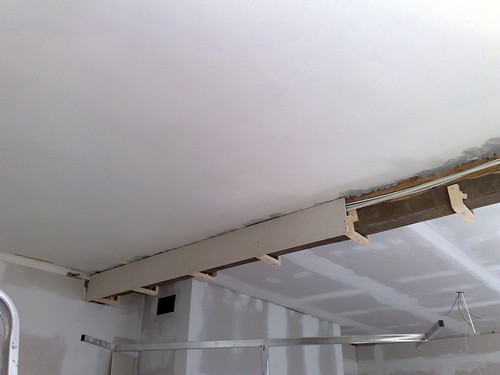
On the third day, more specifically Tuesday 22nd, I rose up from the dead and began working out different solutions to our timber log problem while Lady C was asleep. As you may have seen from previous pictures and below, there’s a beam across the ceiling where a light brick wall between warm living room and dining room once stood. The wall’s removed long ago, making a pretty decent 40 sq. metre living room, but we got a pretty ugly and SATANICALLY UNEVEN log to stiffen the outer and inner walls horizontally in return. They obviously didn’t care how it looked when they set it up, just see this picture feat. electricity tubes and networking cables, because they subsequently lowered the ceiling by some 40cm. So we needed to box it in, but being that we would have to live with the results, it had to be carefully levelled.
After some trial and error (not to mention all the sleepless nights prior in planning this) I ended up constructing 8 U-profiles in 23mm wood with metal mountings for an approximated 90° angle on either side;
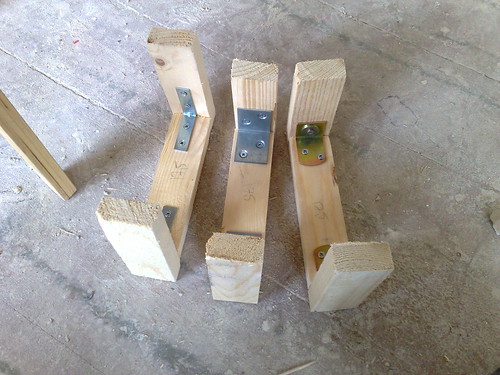
3 of 8 handmade U-profiles

Each of them took around 30 minutes to make, after which I would have a breather, being I was not entirely well. This last photo shows my quick and dirty hack of using a Norwegian crowner (1 NOK) with a slightly expanded hole to serve as support for the screws that were just too small-headed for the hole. This is actually QUITE ILLEGAL, namely defacing a Norwegian coin, and I could be arrested for treason for this attack against the King and the Kingdom of Norway. Guantanamo next, I suppose, since I had to spend as much as 3 NOK to get the profiles done proper.
That same evening I got an SMS from my uncle telling me he needed some of his equipment back, including the plaster board elevator needed for this project! This left us with little choice but to go on with my plan. On Wednesday 23rd, even though Lady C was still a bit feverish, we began boxing in our arch enemy, the log:
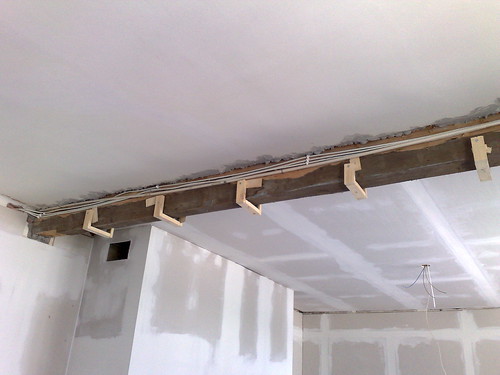
5 of 8 U-profiles, all level to each other, fastened with 2 high-strength screws on the ears and 1 stabilizing screw from below.
Adding the first plaster board
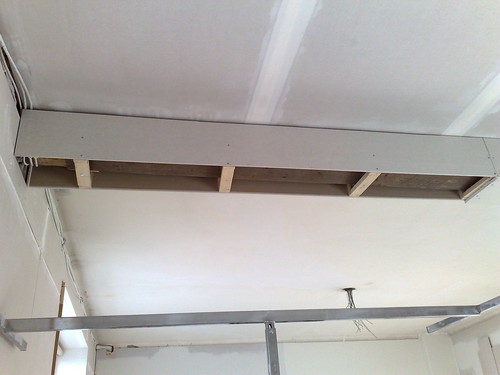
Ready to add the last board (feat. the much loved plaster elevator)
As you can see the result was rather professional looking. Being that the log itself was not level, the only easier method would have been to first cut it with a chainsaw to allow for level attach points and then box out from there. Since I don’t have a chainsaw and Lady C would never let me use one, we had to box it out like this instead. Takes some more levelling but you’ll get there eventually!
We don’t have a car that we own. Instead, we’ve been borrowing a car from The Army Dude, which is more like a Volkswagen wreck than a rolling dream of safety. But it’s perfect for our dirty kind of projects which involves driving a lot of waste material to the dump in the back.. Unfortunately it was in repair when we had to deliver the plaster board elevator to my uncle, Thursday 24th, so we finally ended up renting this car from Hertz:

Volvo V50!
Counting all the extras, this car new costs more than an entire year on my salary.. And I learned to drive in a metallic green Volvo 940. Being that I was still feeling a bit iffy, it was the perfect car for the long journey out of rush-time Oslo, despite my being paranoid about the paint coat. The only downside I could find were the large beams between the windows blocking the view. This exercise took all day and we were back at 8 o’clock in the evening.
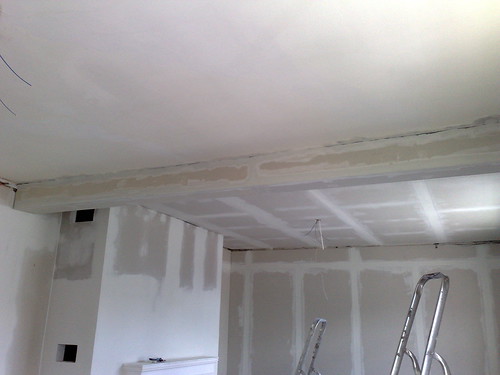
Friday 25th I cut up the remaining materials, wood and plaster, and vacuumed dust while Lady C began the spackling horror job. I say horror because I don’t like spackling very much. In fact, I hate it. I like doing something useful, but since I could never get into the zen of spackling I only seem to work against myself, removing too much or adding too little. Luckily, Lady C does a GREAT job and has the mild temper that I lack with this sort of thing. While I do my best to assist her and not get in the way.
Getting in the way means toilet-lockup for 30 minutes for each error that I made. "Bad Sigg3, very bad Sigg3!" she shouts, and turns the key. Then she turn off the lights and turn on the ceiling fan, and I sit there in the corner, trembling. No wonder I don’t like spackling.. but while I rock back and forth in the aura of a not-recently-cleaned WC, I remind myself of the results, which are great!
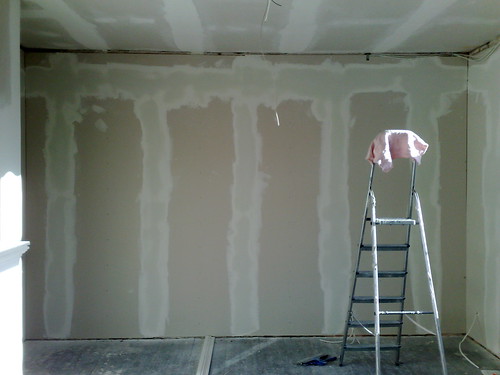
Come Saturday June 26th we didn’t have much spackle left, even though the job requires more. Instead we headed butt-first into repairing our last ceiling. It doesn’t have many flaws except the few cracks it has sustained over the course of 80 years since it’s birth. Just spackling it would postpone the problem a few years, but we didn’t want to stretch a canvas across the room, taking some 5-10cm of the height, or put up plaster boards.
Instead we used a special wall-paper reinforcement called wall-renewer from Leco Reno. We both hate wallpapering, since that dreadful day we found an entire wall in our bedroom filled with BUBBLES! and broke down crying. Luckily, this product was much thinner and easier to work with than the last renewer we used. It also helps to be nazi about the preparations; first you go over the ceiling with a fine finishing paper to remove any flecks of paint that’s loose. Then you wash it with a special cleaning product. Then you wash that with pure water. Then you pre-glue the entire ceiling. When all that’s done? You can start doing the effin’ job. But kids, I shall say this only once; the result of your labour depends 90% on your preparations.


As you can’t see from these photos, the seams are nearly invisible. I think a good 4 layers of ceiling paint will take care of the rest.
Having been through all that and more, I collapsed on Sunday 27th and slept all day. Lady C, bless her, held up the torch and mended the windows she’s repaired in the living room. And today it was back to work again!
According to our plan posted about a week ago, we only missed "Start laying out the floor". Here’s the current status quo of what needs to be done, in somewhat chronological order, before we can finally move our stuff up from storage:
What remains, then:
– Moulding and moulding roses; living room, hallway & study
– Firewall for the study *
– Start laying out the floor; living room & study
– Moving the piano (hiring professionals); living room
– Setting up the double door; study
– Paint the place in full 24-bit technicolor; living room & study
– Finish EL (hiring professionals); living room & study
+ finish network cabling
+ new fireplace in study (hiring professionals)
+ moving up all the boxes
This may seem like a lot, but actually the worst part is over. Most of this we can manage on our own, not having to take any extra vacation to finish. Moulding takes time and precision, but I can do that myself in the weekends. The only problem is transport since The Army Dude‘s car is in repair for an indefinite period, and we need some more spackle paste as well as siporex blocks (aerated concrete) for the firewall. Not to mention the now on-sale Bosch PFS 65 spray-paint system.
That’s awesome and all. You guys are marvelous and it all going swimingly… but when are you going to be fucking done
Yours truly,
your downstairs neighbor
:-)
Within a couple of months I hope. Lady C’s been doing some incredible advances the last couple of days this week, so I’ll start with the moulding this weekend.
Then there are some minor though time-consuming repairs to be done on the livingroom floor BEFORE we can lay out the newly bought floor on top:)
Everything just needs to run its course..