Here are some photos of the current stage of our total renovation:
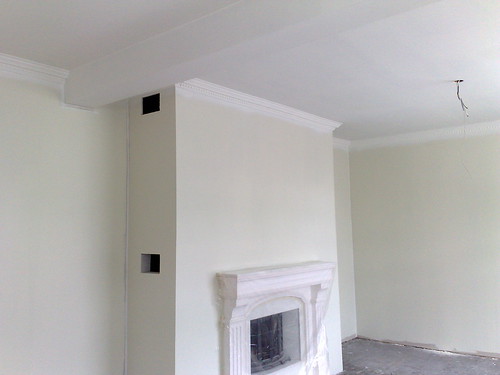
The box in the ceiling has turned out fantastic after Lady C’s 6-8 rounds of spackling. She’s brilliant. I intend to rent her out to parties, where she would even a wall while the children have cake.

Grace. Excellence. Superiority. The trademarks of my work.
Our living-room on July 12th 2010.

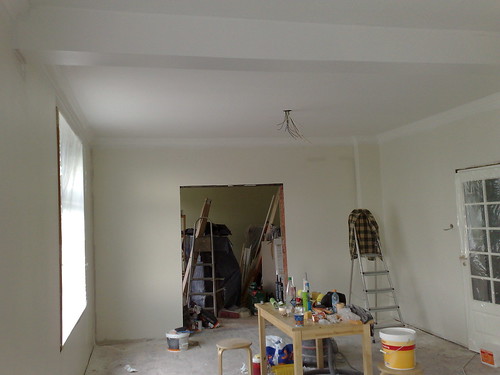
We just need some more paint, a floor and finishing along the edges.
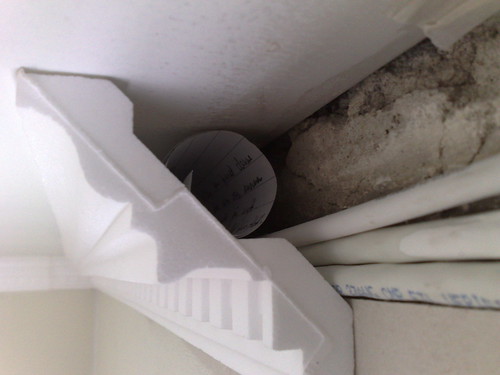
We left a secret note to future DIY generations!
You can see more photos from our Extreme DIY project on flickr.
As you can imagine there is not much left to do here. Today and yesterday while I’ve been at work watching funny OMG lolcat vids on youtube, Lady C has been at home painting and finishing and painting. I hate it when she gets to be at home working on our "pet project" a.k.a Home, when I have to sit and rot at the office. Really brings me down low. I’ll be taking some days off next week to climb up from this hole.
But what remains, really?
Practically, nothing that we can’t handle. As you can see from the last photo above, there is a small chasm where there once was a wall between the dining room and the warm living room. We have no idea when the wall came down, but probably in the 70’s when mr. I’ll-fix-it carpenter lived here and turned it into a dump (see the sales-pictures for comparison).
You should put a parquet floor where the previous (wood) floor is at, but never where there is no floor, as between the living-room floors depicted. This is because the different underlying (wooden) floors move differently, and means that we’ll have to lay 2 floors in the living-room separated by a self-made "hat". One of my uncles who’s really good at this will make one custom for us.
We still need to put up the moulding roses (rosett) in the living-rooms, but only after we’ve made a secure fix for putting up heavy lamps. There are no such nooks there now, and today Lady C’s been in yelling competitions with several hardware shops in town. But when you’ve done the heavy lifts and construction designs as we have, the know-it-all attitude of the hardware profession will only yield rage and a bad review. Ignorance permeates the business.
In the meantime, there’s dust everywhere:)
We’ve bought the Jøtul F 100 cast iron stove in black for the library/study/guest room and will need to put up a firewall. The Dovre equivalent would let us do without, but the F100 can yield more heat and simply looks better. Besides, having had problems with our Dovre Wood Cassette in the living-room (now solved) and no such trouble with the Jøtul in the kitchen, Lady C put her foot down. Here’s a picture with dimensions in millimetres.
Insanely enough, the wood stove workers at the store treated us as simple noobs and wanted to sell us 6 centimetre firewall plates at 1400 NOK per piece. We’d need 2 pieces + glue and the work = around 3500 NOK I guess. Here’s what you do; check out the fire stove manual which has the specifics on external/built-in firewall and the right angles and distances to combustible walls/material. In our case we needed only 1 firewall because the other side of the corner chimney is in old brick, and the required dimensions for the F100 at a corner-angle are 800 x 900 mm x 100 mm.
Guess what’s approved as firewall material? Siporex, a concrete building block that consists of 80% air, is ultra-light and easily manipulated with a regular handsaw and finishing paper! A 60 by 40 cm block costs you 40 NOK, and for 80 x 90 firewall you’ll just need 3 of them, at a price of 120 NOK + glue. You just saved more than three thousand NOK ($400 USD). If that wasn’t enough, the result is a lot nicer than the over-priced plates, and only builds 4 cm more. The shit you learn when you DIY is incredible. And economical.
After the painting and finishing of the moulds are ready we can focus on the floors. This means eventually having to move around large amounts of building material, a couple of couches and equipment that’s no longer needed or just needed for a little while before we can move up and in. And a piano.
In-between there’s our summer holiday in the North, of course, where we’ll both die from frustration. I’ll blog about that later.